If you crave warm, fluffy rolls filled with garlic and herbs, you’re in the right place! In this easy recipe, I’ll show you how to make Garlic Herb Dinner Rolls that are sure to impress. These rolls are perfect for any meal and even better as a snack. Let’s gather our ingredients and dive into the step-by-step process to create these delightful bites! Your dinner table has never looked so good!
Why I Love This Recipe
- Homemade Goodness: There’s nothing quite like the aroma of freshly baked bread filling your kitchen, and these rolls are no exception!
- Versatile Pairing: These rolls complement a wide range of meals, from soups to roasted meats, making them a perfect side dish.
- Herb-Infused Flavor: The combination of garlic and fresh herbs elevates these rolls, giving them a unique taste that will impress your guests.
- Easy to Make: With simple ingredients and straightforward steps, even beginner bakers can master this recipe with ease.
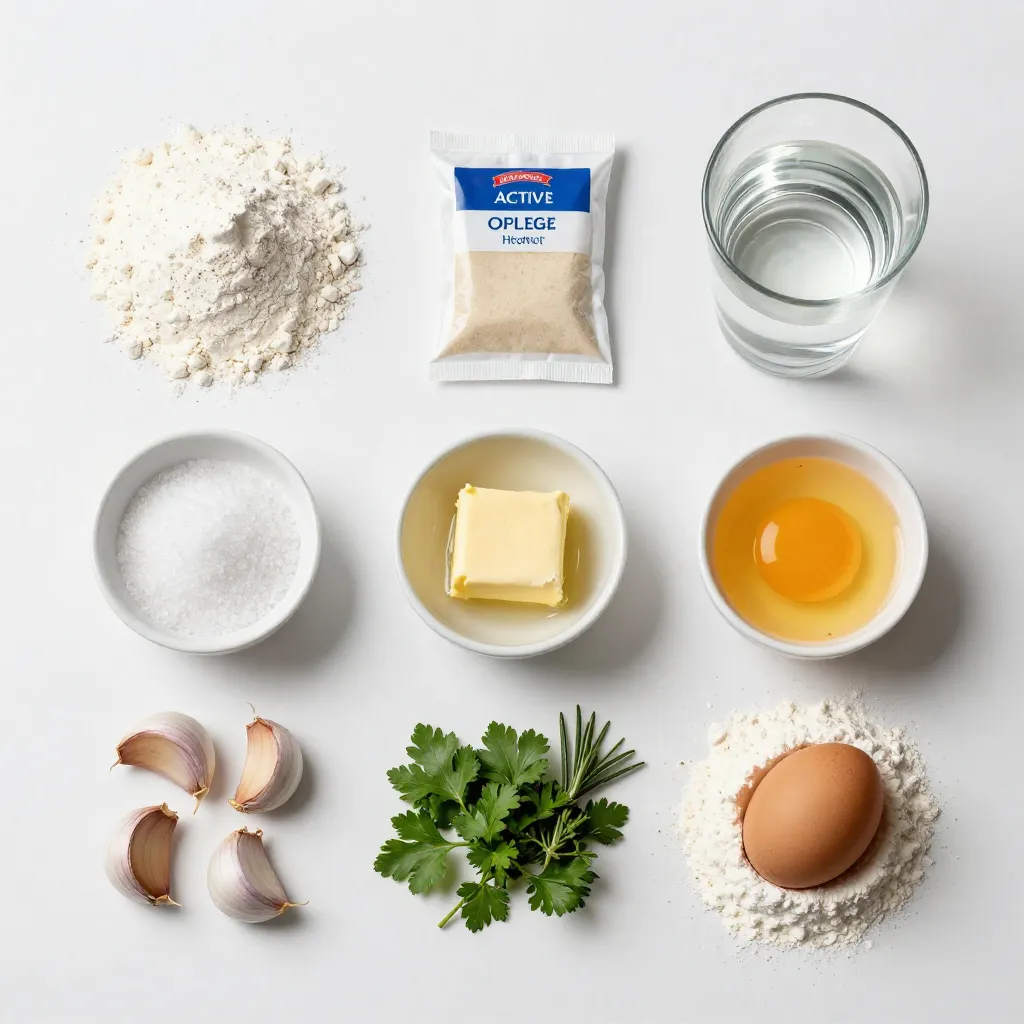
Ingredients
List of Essential Ingredients
To make the best garlic herb dinner rolls, gather these key items:
– 3 cups all-purpose flour
– 1 packet (2 1/4 teaspoons) active dry yeast
– 1 cup warm water (about 110°F)
– 2 tablespoons sugar
– 1 teaspoon salt
– 1/4 cup unsalted butter, melted
– 3 cloves garlic, minced
– 1 tablespoon fresh parsley, chopped
– 1 tablespoon fresh rosemary, chopped
– 1 tablespoon fresh thyme, chopped
– 1 egg (for egg wash)
– Extra flour for dusting
These ingredients work together to create soft, fluffy rolls with a rich garlic flavor.
Optional Ingredients for Enhancements
Want to take your rolls to the next level? Consider these options:
– Grated Parmesan cheese for a cheesy twist
– Chopped green onions for extra flavor
– Other herbs like basil or oregano for varied tastes
These additions can enhance the flavor and make your rolls even more special.
Notes on Ingredient Substitutions
Don’t have all the ingredients? Here are some swaps:
– Use bread flour instead of all-purpose for a chewier texture.
– Substitute honey or maple syrup for sugar for a natural sweetener.
– If you can’t find fresh herbs, dried herbs work. Just use less, about one-third of the amount.
These substitutions can help you make these rolls work with what you have at home.
Step-by-Step Instructions
Activating the Yeast
Start by taking a small bowl. Add 1 cup of warm water. The water should be about 110°F. Stir in 2 tablespoons of sugar and 1 packet of active dry yeast. Wait for 5-10 minutes. You will see bubbles forming. This means the yeast is active and ready to use.
Mixing and Kneading the Dough
Now, grab a large mixing bowl. Add 3 cups of all-purpose flour and 1 teaspoon of salt. Make a well in the center. Pour in the melted butter and the yeast mixture. Add 3 cloves of minced garlic too. Mix everything together until it begins to form a dough.
Next, move the dough to a floured surface. Knead it for 5-7 minutes. You want it smooth and elastic. If it sticks to your hands, sprinkle a little more flour on top. After that, add 1 tablespoon each of chopped parsley, rosemary, and thyme. Knead again until the herbs are mixed well.
Shaping and Rising the Rolls
Once the dough is ready, place it in a lightly greased bowl. Cover it with a kitchen towel. Let it rise in a warm spot for about 1 hour. It should double in size. After the first rise, punch the dough down to let out the air.
Divide the dough into 12 equal pieces. Roll each piece into a ball. Place the balls on a greased baking sheet, leaving space between each one. Cover the rolls again with a towel. Let them rise for another 30 minutes until they puff up.
Baking the Rolls
While the rolls rise, preheat your oven to 375°F. After the second rise, beat 1 egg in a small bowl. Brush the egg wash on top of each roll. This helps them get a nice golden color.
Now, bake the rolls in the oven for 15-20 minutes. They should turn golden brown. Tap the bottom; it should sound hollow when they are done. Finally, remove them from the oven and let them cool slightly on a wire rack. Enjoy the warm, fluffy rolls!
Tips & Tricks
Perfecting the Texture of Your Rolls
To get soft and fluffy rolls, you need to knead the dough well. Kneading makes the gluten strong. This helps the rolls rise and stay airy. It takes about 5 to 7 minutes. If the dough sticks to your hands, add a little flour. Make sure the dough feels smooth and elastic.
Also, let the dough rise in a warm place. The warmth helps it double in size. I like to cover it with a towel. This keeps the moisture in.
Common Mistakes to Avoid
One mistake is not activating the yeast. Always mix warm water with sugar and yeast first. Wait until it bubbles; this shows it’s ready. If you skip this step, your rolls won’t rise.
Another mistake is shaping the rolls too tightly. Gently form them into balls. If they are too tight, they might not rise well. Keep them spaced on the baking sheet. This gives them room to grow.
Enhancing Flavor with Additional Herbs
To add more flavor, try using different herbs. Basil, oregano, or chives can add a twist. You can mix fresh herbs into the dough. Just chop them finely.
If you want a stronger garlic taste, double the minced garlic. You can also sprinkle garlic powder on top before baking. A little sprinkle of grated cheese on top can add a nice touch too. Experiment and find your favorite mix!
Pro Tips
- Use Fresh Herbs: Fresh herbs will provide a vibrant flavor that dried herbs cannot replicate. Always opt for fresh parsley, rosemary, and thyme for the best results.
- Monitor the Temperature: Ensure your water is the correct temperature (about 110°F) to activate the yeast properly without killing it. Use a thermometer for accuracy.
- Knead Properly: Knead the dough until it is smooth and elastic. This helps develop the gluten, creating a light and airy texture in your rolls.
- Let Them Cool: Allow the rolls to cool slightly on a wire rack. This prevents them from becoming soggy on the bottom, ensuring a perfect texture.
Variations
Cheese and Herb Dinner Rolls
You can add cheese for a tasty twist. Try using shredded mozzarella or cheddar. Mix in about 1 cup of cheese with the flour and salt. This will give your rolls a gooey, cheesy center. Brush the tops with extra melted butter for a rich flavor. The cheese melts in the oven, creating a delightful surprise in each bite.
Whole Wheat Garlic Herb Rolls
For a healthier option, use whole wheat flour. Replace all-purpose flour with the same amount of whole wheat flour. This adds fiber and nutrients. You may need a bit more water since whole wheat absorbs more moisture. These rolls will have a nutty flavor and a denser texture. They pair perfectly with soups or salads.
Vegan Garlic Herb Rolls
To make these rolls vegan, skip the egg wash. Use plant-based milk to brush the tops for a nice golden color. Replace the butter with coconut oil or vegan butter. The rolls will still rise well and taste amazing. You won’t miss the egg at all! These vegan rolls are great for anyone following a plant-based diet.
Storage Info
How to Store Leftover Rolls
To keep your leftover rolls fresh, store them in an airtight container. This helps prevent them from drying out. You can also wrap them in plastic wrap or aluminum foil. If you have a lot left, you can place them in a large zip-top bag. Keep them at room temperature for up to three days. If you live in a humid area, try to use them within two days for the best taste.
Freezing Instructions
If you want to save some rolls for later, freezing is a great option. First, let the rolls cool completely. Once cool, place them in a single layer on a baking sheet. This prevents them from sticking together. Freeze for about an hour. After that, transfer the rolls to a freezer bag. Seal it tightly, removing as much air as possible. These rolls can stay fresh in the freezer for up to three months.
Reheating Tips for Optimal Freshness
To enjoy your rolls again, reheating is key. Preheat your oven to 350°F. Wrap the rolls in aluminum foil to keep them soft. Place them on a baking sheet and heat for about 10-15 minutes. If you want a crispier crust, remove the foil for the last few minutes. You can also microwave them for about 15-20 seconds. Just be careful not to overheat, or they may become tough. Enjoy your warm, fluffy garlic herb rolls!
FAQs
Can I make the dough ahead of time?
Yes, you can make the dough ahead of time. After you knead the dough, let it rise. Once it doubles in size, punch it down and cover it. Place it in the fridge for up to 24 hours. When you’re ready, let it sit at room temperature for about 30 minutes before shaping the rolls.
How can I tell when the rolls are fully baked?
The rolls are fully baked when they turn golden brown. You can tap the bottom of a roll. If it sounds hollow, it’s ready. Bake them for 15 to 20 minutes at 375°F. Keep an eye on them to avoid overbaking.
What can I serve with garlic herb dinner rolls?
Garlic herb dinner rolls pair well with many dishes. Try serving them with:
– Soups, like tomato or minestrone
– Stews, such as beef or vegetable
– Salads, especially Caesar or mixed greens
– Dips, like herb-infused butter or hummus
These rolls add a warm and tasty touch to any meal. Enjoy them fresh for the best flavor!
In this article, we explored the essential ingredients for making delicious rolls, from yeast to optional herbs. I provided step-by-step instructions to guide you through every part of the process, ensuring perfect results. You learned about tips for texture, common mistakes, and exciting roll variations to try. Remember to store your leftovers properly to keep them fresh. I hope these insights inspire you to bake and enjoy wonderful garlic herb dinner rolls often. Happy bakin