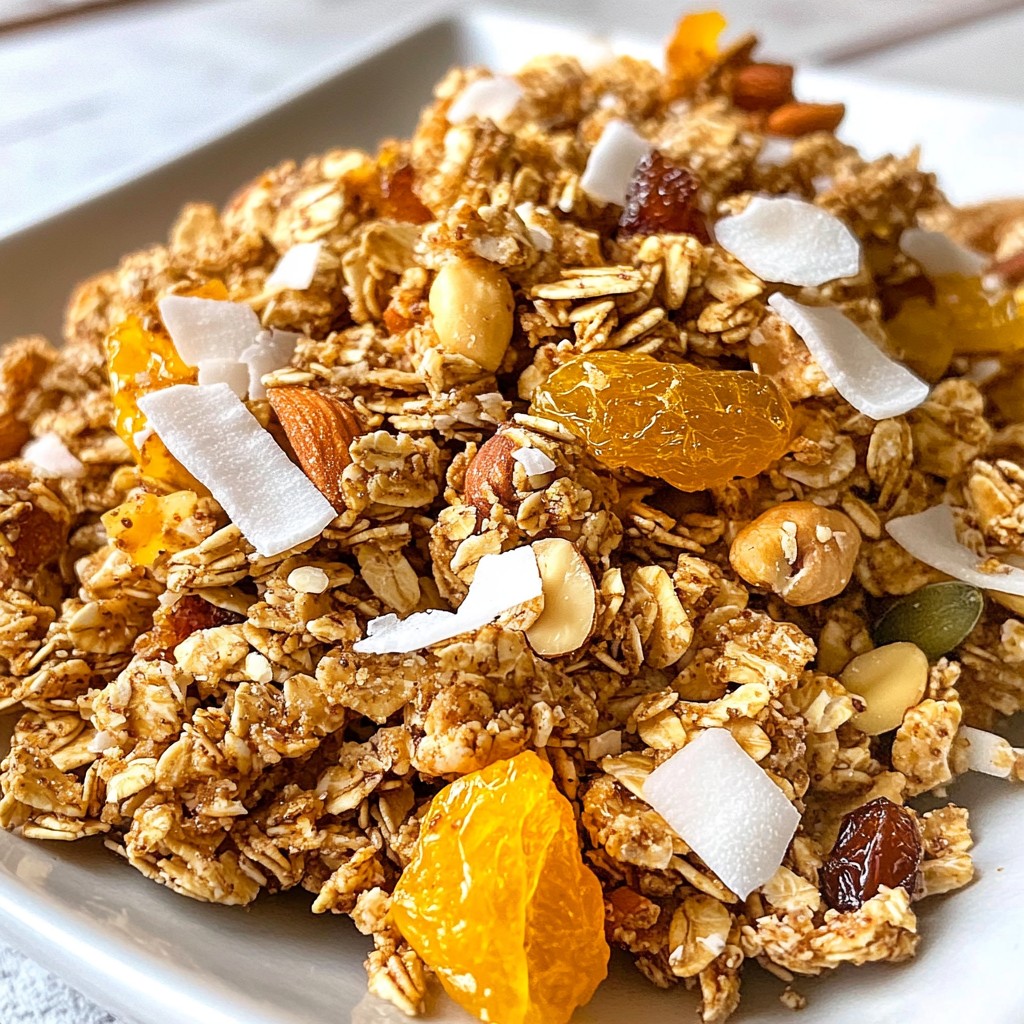
Looking for a snack that’s both crunchy and sweet? You've found it! This easy recipe for Crunchy Honey Granola Clusters gives you the perfect blend of taste and texture. With simple ingredients and quick steps, you’ll have a delicious treat in no time. Whether you want a healthy breakfast or a tasty snack, this granola will satisfy. Let’s get started on making your new favorite crunchy delight!
Why I Love This Recipe
- Deliciously Crunchy: The combination of oats, nuts, and seeds creates a satisfying crunch in every bite.
- Customizable: You can easily swap in your favorite nuts and dried fruits to make it your own.
- Healthy Snack: This granola is packed with nutrients, making it a perfect guilt-free snack or breakfast option.
- Easy to Make: With just a few simple steps, you can whip up a big batch of granola in no time!
Ingredients
List of Essential Ingredients
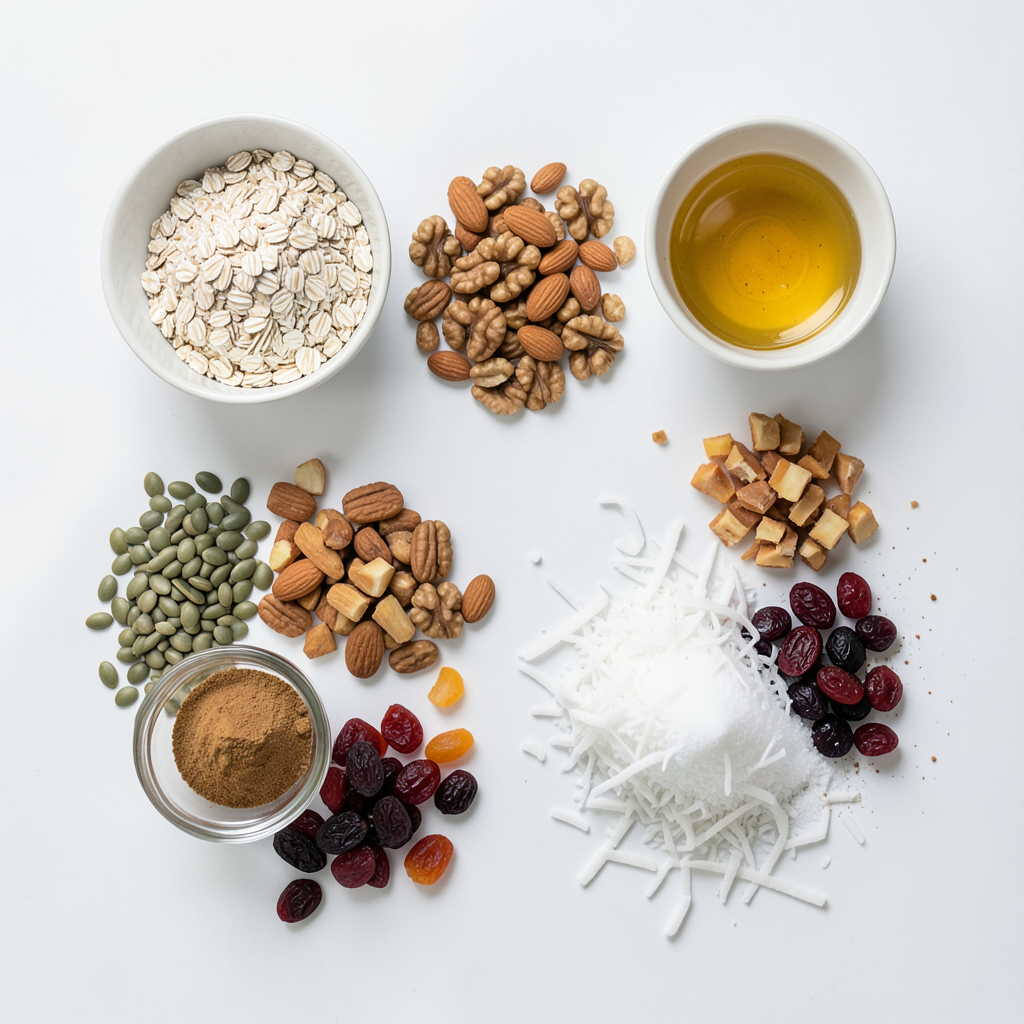
To make Crunchy Honey Granola Clusters, you need these main items:
- 3 cups rolled oats
- 1 cup nuts (almonds, walnuts, or pecans), chopped
- 1 cup seeds (pumpkin or sunflower seeds)
- 1 cup shredded coconut (unsweetened)
- 1/2 cup honey
- 1/4 cup coconut oil, melted
- 1 teaspoon vanilla extract
- 1/2 teaspoon cinnamon
- 1/4 teaspoon salt
These ingredients create a tasty base for your granola. The oats give it texture. The nuts and seeds add crunch and healthy fats. Honey binds everything together and adds sweetness.
Optional Ingredients for Variation
You can mix in some fun extras to make it your own:
- 1/2 cup dried fruit (raisins, cranberries, or chopped apricots)
- 1/4 cup chocolate chips for a sweet touch
- 1/4 cup nut butter for added richness
- A pinch of nutmeg for a warm spice flavor
Feel free to play with these options. They will change the taste and texture.
Nutritional Information per Serving
Each serving of this granola offers great nutrition. Here is a rough breakdown:
- Calories: 200
- Protein: 5g
- Fat: 10g
- Carbohydrates: 30g
- Fiber: 4g
- Sugar: 6g
This is a healthy snack or breakfast choice. It’s packed with energy and nutrients, perfect for your active day. Remember, the exact nutrition may change based on your chosen ingredients.
Step-by-Step Instructions
Preparation Process
Start by preheating your oven to 300°F (150°C). While it heats, line a baking sheet with parchment paper. In a large bowl, mix the rolled oats, chopped nuts, seeds, shredded coconut, cinnamon, and salt. Make sure all the dry ingredients blend well. In a separate bowl, whisk the honey, melted coconut oil, and vanilla extract together until smooth. Pour this mixture over the dry ingredients. Stir everything until all ingredients are well-coated.
Baking Instructions
Now, transfer your mixture to the prepared baking sheet. Spread it out evenly to create one layer. Place it in the preheated oven. Bake for about 25 to 30 minutes. Stir the granola every 10 minutes. This helps it brown evenly. Watch for a golden brown color and a nice, toasty smell.
Cooling and Storing Instructions
Once baked, remove the granola from the oven. Let it cool completely on the baking sheet. This cooling is key for forming crunchy clusters. After cooling, gently break the granola into clusters. Mix in your favorite dried fruit. Store the granola clusters in an airtight container at room temperature. They will stay fresh for up to two weeks.
Tips & Tricks
How to Achieve Maximum Crunchiness
To get your granola clusters super crunchy, follow a few key steps. First, use rolled oats; they hold up well. Second, don’t skip the coconut oil. It helps bind the ingredients and adds crunch. Spread the mixture evenly on the baking sheet. This ensures even cooking. Stir every ten minutes while baking; it helps brown the granola evenly. Finally, let it cool completely on the baking sheet. This cooling time is crucial for forming those delightful clusters.
Common Mistakes to Avoid
Avoid using quick oats; they can become mushy. Also, be careful not to add too much honey. Too much moisture can lead to soft granola. Make sure to mix the dry and wet ingredients well. This ensures even coating and flavor. When baking, don’t open the oven door too often. This can cause uneven cooking. Lastly, let the granola cool completely before breaking it into clusters. If you don’t, it may crumble instead of forming nice chunks.
Suggested Serving Ideas
Granola clusters are versatile and delicious. Enjoy them as a snack or breakfast. Serve them with yogurt and fresh fruit for a tasty parfait. You can also sprinkle them on oatmeal for added crunch. Mix them into your favorite smoothie bowl for a fun texture. If you like a sweet treat, try topping ice cream with granola clusters. The options are endless, so get creative!
Pro Tips
- Use Fresh Ingredients: Ensure your nuts, seeds, and dried fruits are fresh to enhance the flavor and texture of your granola.
- Adjust Sweetness: Feel free to adjust the amount of honey based on your preferred sweetness level or substitute with maple syrup for a different flavor.
- Experiment with Spices: Add different spices like nutmeg or ginger to give your granola a unique twist and extra warmth.
- Store Properly: For maximum freshness, store your granola in an airtight container and keep it in a cool, dry place.
Variations
Nut-Free Version
You can easily make a nut-free version of these crunchy granola clusters. Just skip the nuts. Replace them with more seeds. You can use an extra cup of pumpkin or sunflower seeds. This keeps the texture crunchy and adds healthy fats. You still get a tasty treat without any nuts.
Gluten-Free Options
If you need a gluten-free option, stick to certified gluten-free oats. Most rolled oats contain gluten. However, brands make oats that are safe for gluten-free diets. Double-check the label before buying. This way, you can enjoy your granola without worry.
Flavor Additions
You can make your granola even more delicious with extra flavors. Here are some ideas:
- Spices: Add more cinnamon or try nutmeg for a warm taste.
- Extracts: Use almond or maple extract for a unique twist.
- Cocoa: Mix in some cocoa powder for a chocolatey flavor.
Feel free to experiment with different combinations. Each one will give you a new taste experience. Enjoy the fun of creating your own unique granola clusters!
Storage Information
Best Practices for Storing Granola
To keep your crunchy honey granola clusters fresh, store them in an airtight container. A glass jar or a plastic bin works well. Avoid plastic bags, as they let air in. Keep the container in a cool, dry place. This helps maintain the clusters' crispness and flavor.
How Long It Lasts
When stored correctly, your granola can last up to two weeks. After that, it may lose some crunch. If you want to keep it longer, consider freezing it. Granola can last up to three months in the freezer. Just make sure to use a freezer-safe container.
Re-crunching Granola Tips
If your granola loses its crunch, don’t worry. You can easily bring it back to life. Spread the granola on a baking sheet. Bake it at 300°F (150°C) for about 10 minutes. Stir it halfway through to ensure even heating. Let it cool before enjoying your crispy clusters again!
FAQs
Can I use different sweeteners instead of honey?
Yes, you can use other sweeteners. Maple syrup is a great option. Agave nectar works well too. Both give a sweet taste and keep the clusters together. If you want a sugar-free choice, try using mashed bananas or apple sauce. Just remember that these may change the flavor a bit.
How can I make these granola clusters vegan?
To make these granola clusters vegan, swap honey for maple syrup or agave. These sweeteners are plant-based and work well in this recipe. Also, check your vanilla extract to ensure it’s vegan. Use a non-dairy butter or coconut oil to replace any other animal fats.
What can I substitute for coconut oil?
If you don’t have coconut oil, you can use olive oil or vegetable oil. Both will still help the granola clump. You might also try using melted butter for a richer taste. Just keep in mind that it will not be vegan if you choose butter.
This blog post detailed how to make delicious granola. We covered essential and optional ingredients, along with their nutritional info. I shared step-by-step instructions for preparation, baking, cooling, and storing. You learned tips for crunchiness and common mistakes to avoid. Variations like nut-free and gluten-free options add flexibility. Finally, I highlighted storage tips and answered common questions.
Experiment with the ideas shared. Enjoy making granola your own!